Image Optimising & Uploading SOP
This document is designed to give a clear understanding of the process and importance of adding images to a website correctly.
Step One:
Locate the images you want to upload in one of the free or paid for resources, an example of these resources are:
https://www.pexels.com/
https://unsplash.com/
https://pixabay.com/
Step Two:
Find a relevant image and download the image. Select the “large” option from the drop-down menu.
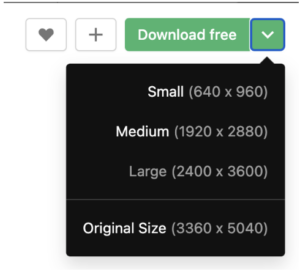
Specify this before you hit download and save to your computer.
Step Three:
Open “downloads” in Finder.
It is this at this stage, you will rename your image, find your image that you have downloaded and right-click to rename the image.
The image should be saved as the “focus keyword” or the category that you wish to target, NOT the default url of the image e.g. andre-hunter-xpxKHXmxwOM-unsplash.jpg
Bad

Good

Step Four:
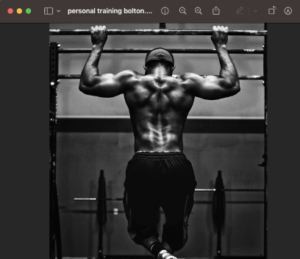
Once you have renamed the image, click on the image to open in “preview.”
This will open “preview”
Step Five:
Select the area of the image you need for your blog, or landing page.
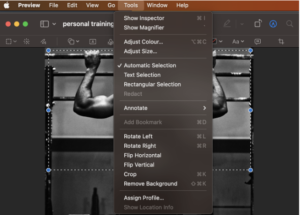
Step Six:
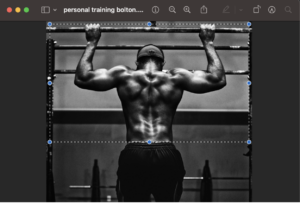
You need to now crop the image. You do this by hovering over the “Tools” drop-down. And hit “Crop”
Step Seven:
You now need to adjust the size of the image, this is one of the essential elements in the image optimisation process. We cannot compromise the quality of the image for SEO.
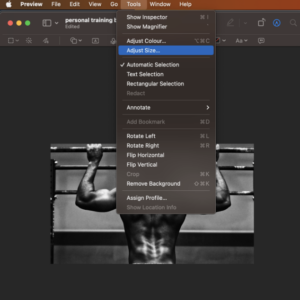
Step Eight:
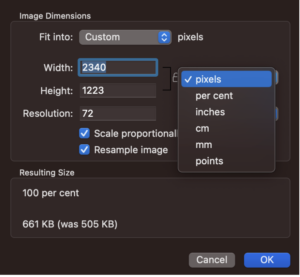
Select pixels from the drop-down on the right-hand side.
Step Nine:
Select Width as “1920”. The height will auto-populate. As long as 1920 as the width is selected, the height matters less as the CMS will auto-crop.
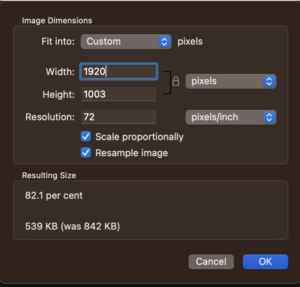
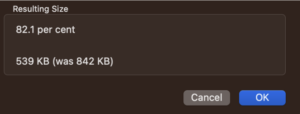
Step Ten:
Before clicking save, check the resulting size at the bottom of the pop-up window should is no more than 1000 KB
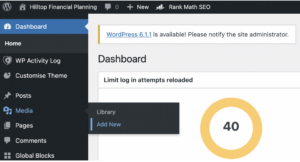
Step Eleven:
You’ll now have everything you need to start uploading your compressed images. Log in to the relevant client’s CMS (e.g. https://www.hilltopfinance.co.uk/wp-admin). Once you’ve logged in, navigate over to Media > Add New.
Step Twelve:
Click “Select Files” and navigate over to your Downloads folder where your image has been saved.
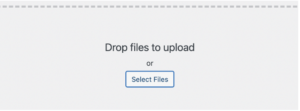
If you’re uploading multiple images, hold CMD (Mac)/CTRL (Windows) and individually select all the compressed images you want to upload and hit “Open”. Otherwise, just select the single image you want to upload and hit “Open”.
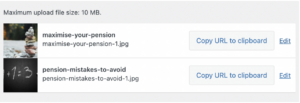
Step Thirteen:
The images will start uploading to WordPress, so wait until they’re all uploaded before moving ahead.
Once they’re done, you should see something like this:
Step Fourteen:
Navigate to the page or post you want to upload the image to and click on the page.
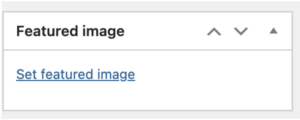
Once in the page, navigate to the bottom of the page on the right-hand side and click on “set featured image.”
Step Fifteen:
You will be presented with a pop-up that includes several fields and the whole media library.
Select the image you have just resized and compressed from the media library.
You should add your focus keyword to both the image’s title and the “Alt Text.”
Alt text is the information that search engines use to verbally describe what images look like to users who might be visually impaired.
There’s also evidence that including your target keyword in the alt text can help improve organic performance.
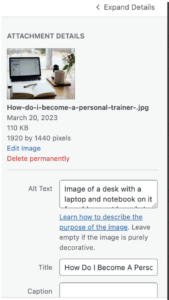
The blog that I’m uploading this image to will be a support piece that links to Hilltop’s “Pension Review” service, so I’ve included that in the alt text.
Once these fields have been completed, hit “set featured image.”
Step Sixteen:
To publish the image, you must update the page, this button is at the top of the page.

Step Seventeen:
Check your image once uploaded, including the following checks:
1. The image isn’t pixelated
2. The focus point isn’t way out. (no heads are chopped out)
3. The quality hasn’t dropped significantly
4. Check on a mobile how the image presents
5. You think the image looks as sound now as when you found the image.
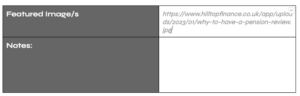
Sourcing Images For Blog Briefs
If you’re sourcing and uploading images as part of a blog brief, hit the “Copy URL to clipboard” button in the screenshot above and paste the link (CMD + V for Mac/CTRL + V for Windows) into the relevant blog brief in the “Featured Image/s” box.
This means that whoever is in charge of uploading the completed blog will know which image to use when it comes to it.
![]()