Folder Placement SOP:
Folder Placement SOP:
Step 1:
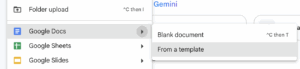
The first thing you’ll want to do, depending on your task, is go into the Google Drive and select the task-specific template. This only applies if your task has a template within the drive, such as when completing a blog brief.
If you’re not using a template, simply create a blank document, whether that’s in Google Docs, Google Sheets, or Google Slides.
Step 2:
Once you have selected the correct template, make sure to create a copy of it. If you do not do this, you will just be editing the templated version of the document.
If you’re not using a template, this doesn’t apply to you.
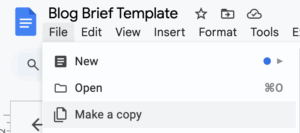
The new copy title should include the client’s company name and blog title, as well as the blog brief at the end to indicate its brevity. (This example is tailored for blog briefs.) It should look something like this: “Client Name: Blog Title Blog Brief”
Step 3:
Now that you have copied the template and given the document the correct title, you’ll need to move the document to the proper folder. You can do this by clicking on the folder button on the top left.
![]()
Step 4:
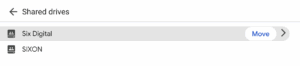
Now that you have clicked this, navigate to “all locations” and then the “shared drive”. After you have entered the shared drive, click on the company folder the document belongs to. All SEO work will fall into the “Six Digital” Category, and any hosting/cybersecurity work will fall into the “SIXON” category.
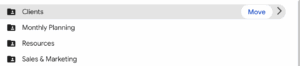
Step 5:
Once you have selected the correct company folder, you will then select the correct folder depending on the work you have completed.
If you have completed a proposal, it will fall into the “Sales & Marketing” folder; if it is an SOP you have created, it will fall into the “Resources” folder, and if it is a strategy document for a client, it will go into the “Monthly planning” folder. In our case, because we have done a blog brief and that is client work, it will fall into the “Clients’ folder.
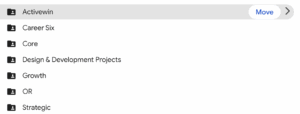
Step 6:
Inside the client’s folder, clients are categorised based on their importance. All the categories and who is in which category are explained in this document right here.
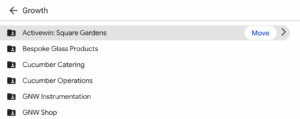
Step 7:
Now that you have selected the correct client category, you will need to choose the correct client you’re doing the document for.
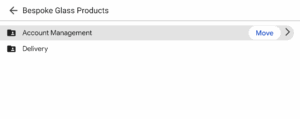
Step 8:
Now that you have selected the correct company, you will have two options: “Delivery” and “Account Management”. Any SEO work will fall into the “Delivery” folder, and any work such as reports, meeting notes, etc, will fall into “Account management”. In our case, the blog brief will be included in the Delivery section.
Step 9:
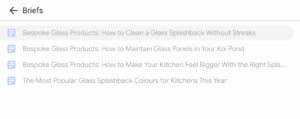
After that, you will then see a “content” specific folder, if you then open that, there should be a particular folder for “briefs”. Once you have opened the folder, you can move your brief into it, which is the correct method for placing your documents in the proper folder.