Creating A Blog Brief
Creating A Blog Brief
Blogs underpin nearly all our SEO strategies and form the backbone of our Hub and Spoke content methodology.
They are not box-ticking exercises that we should carry out to keep our clients happy or to tick a box of deliverables. Content is king, and we will never create content for content’s sake.
This document sets out guidelines for creating a blog brief. This will enable a copywriter to produce content with true guidance.
Step 1: Navigate to the client folder for which you wish to create the blog. This folder will be found in one of the categories and should follow the flow > Client Name > SEO > Content > Blog Brief.
Step 2: Once in the client folder, you should select the template “blog brief template” list of templates found in the template gallery.
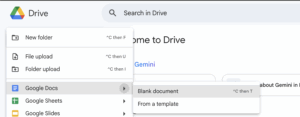
Step 3: Open the template and name the brief in the following format:
Client Name: Blog Name
This is important for a) consistency when sharing with clients and b) searchability within the drive when looking for content.
Step 4: Creating the title for your content is the most critical and hardest element of your blog brief-creating process.
The simple way is to open ChatGPT, give a prompt to give you a number of blog titles and select the most relevant or a combination of titles to expand to provide a stronger title.
In truth, this process works. However, there is a much stronger way to create beautiful blog titles. The basis of a title comes from the need to create spoke content for your hub. You are trying to elevate the search engine rankings, so spending time creating your brief is a) justified and b) more efficient to creating a powerful brief.
In this example, creating a blog is necessary to pass equity and increase the findability of the ranking “healthcare staffing” for Cucumber Recruitment.
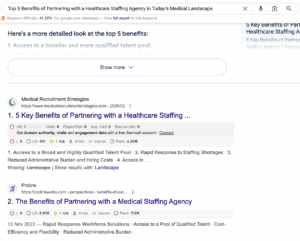
Option One: The Chat Speed Route. This route will work; it will hit the mark. However, this approach isn’t going to be a competitive advantage because all of Cucumber’s clients will have an agency, and they are likely going to be using Chat.
We need to do better than the competition for our clients!

To Prove The Point
Option Two: The deep research approach is what we should aim for. A blank piece of paper and an understanding of the starting point is the most difficult part of generating any idea, not just a blog brief.
Asking Chat for the starting point is a stronger, more competitive approach.
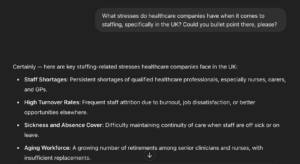
Using this information for your starting point will guide you and inspire you to the next phase of your research.
Cucumber’s USP is that they can quickly fill vacancies and have a pre-screened compliant workforce. So, the bullet points that jump out at me are “workforce planning” & “Regulatory compliance.”
The reason for this is that regulatory-compliant staff are harder to find when you don’t have a recruitment plan or are unable to “predict future staffing needs.”
Planning reduces costs and minimises risks, supporting the bullet points of budget constraints and recruitment challenges.
Armed with that information, I can use Chat to build a significantly stronger blog title.
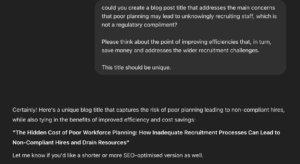
Chat has a habit of adding a two-phased title, it is easy to identify them, and if we can spot them, there is no doubt Google can as well.
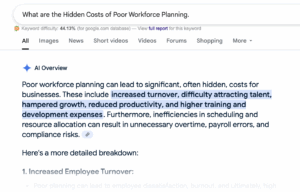
My working title is now: “What are the Hidden Costs of Poor Workforce Planning.”
It’s a beefy title, but it is also a title that is more powerful, and removing “how” follows the philosophy from Thomas Jefferson, which is that “The most valuable of all talents is that of never using two words when one will do.”
There are many options for creating blog posts, but this process is aimed at the junior level and the expectation from the most junior resources.
Step 5: Check that the article is unique. You can do this by simply Googling your title if it doesn’t appear. You’re onto a winner; if it does appear, you are back on the drawing board and should expand your research further.
Step 6: Signing off on the content title is one step that will save hours. The title and the context of the research that has gone into the title should be sent to the client for sign-off.
Once signed off, the blog brief should go into motion only when signed off.
Step 7: Once you have named your template in the client folder, you can begin the meat of creating the brief.
Creating your brief should take time. Careful planning and quality will buy time with results later.
Working through the elements of the brief:
Title: Self-explanatory
Blog Objective: This should be clearly defined. For example, is the blog an internal linking asset? Is it a research piece? Is it news that we want to expand on?
Blog Target Audience:
-
- Primary: Who is the primary target audience? In this case, hiring managers are looking for staffing solutions.
- Secondary: This is the broader objective. This will include picking up long tail searches that a wider audience, ie other people in the sector, will be searching for. This can double up to support brand awareness.
Key Questions/Introduction points: This is the bulk of your brief. The introduction shouldn’t just be a short intro, but we should support the content writer with stats.
For example, I found some interesting stats on this topic on post-medical staffing data analysis. These stats should be added at the introduction stage.

This then follows with your FAQs – this phase is arguably the most difficult to create and find unique FAQs. Chat will support, but an approach that is powerful and returns amazing results is picking your focus keyword.
In this instance, I have decided my keyword will be “Strategic Healthcare Staffing Planning.”
I have added this to https://alsoasked.com/, which has spat out several solid FAQs, including:
- What is a strategic healthcare workforce plan?
- What should be included in a healthcare staffing plan?
I have also pulled on the original Chat prompt and created my own FAQs that are relevant, including:
- Why a Strategic Healthcare Staffing Plan will ensure compliance
- How a healthcare staffing plan can help boost morale. (this one has the potential to be its own blog.
There is no rulebook for FAQs, but no more than 10 for a blog post is a good guide.
The conclusion should wrap up the blog and should flow naturally.
Call to action: The calls to action need to be defined and should not be overpowering.
If the purpose is to provide an internal link, this, in theory, is the call to action, but we should be talking about the client’s USPs and linking to the relevant places to convert.
Tone: In the absence of brand guidelines, you should always ask a team member, but once you understand the concept, you will get a feel for the post’s tone.
Length: The length of a blog post is a constant debate in the SEO world. When Google asks the question, “Does the length of a blog post matter?” the 8th-ranking article for this very common question is this article.
Our expectation is that all blogs should be more than 800 words, and if an FAQ or element can be said in one word, we shouldn’t write two. Similarly, if a point needs more words, we should have the licence to expand the content further.
Content for inspiration: This section helps the content writer and shows the research that has been carried out.
It is absolutely critical that these links work and they are relevant. They can also include video content, stats, publications or written, and printed content.
Keywords to add: Keyword research is the backbone of all our content. However, when writing a detailed article, keywords will flow naturally.
There should be a sprinkling of keywords, but we should be mindful not to stuff keywords in our posts.
The keywords should be relevant and should also act as an opportunity to link internally. Adding the keyword “nurse staffing agency” will enable me to add a link to {https://www.cucumber-recruitment.co.uk/hiring/nursing-staffing-agency}
Internal links to add: One of the key purposes of creating a blog is to provide solid internal links. This should flow naturally through the post and link to internal pages we know we want to promote rankings for as set out in the objective.
This should also include other blog posts that we have previously produced.
Featured Image/s: As discussed in the image upload process, adding the URL to the blog brief will enable faster sign-off for clients who require visibility of images.
Notes: Finally, include notes that will support the copywriter. This should include the significance of the post, how the client responds with feedback, etc.
This should be good and bad!
Step 7: Once we have created our blog brief. It is important to ensure that the client signs off the blog brief before it goes into production.
This will ensure we don’t waste valuable time creating content that won’t be pushed live!
Once signed off, the blog brief should be sent to the copywriter for production. It is at this point Asana should be updated with:
- Next steps
- Copywriter delivery time
- The brief link itself
- The time it has taken you to create the brief